The menu bar is a quick way for your users to navigate to other pages within your Engage site. To create a menu item, hover your mouse over the “Sites” tab and select “Menus”. “Home” is already set as a default menu item and you can add additional pages by selecting the page name from the “Select Links” box.

The page will appear underneath the “Home” menu item. This is the order in which your menu will be displayed on your public facing site. To change the order, click on the three dashes found on the far left of the gray link box and drag up or down. Use the same icon to create sub-menu items by dragging it to the right.
To edit the menu name, click on the gear icon on the far right of the gray link bar. Use the spherical icon next to it to delete the item from the list.

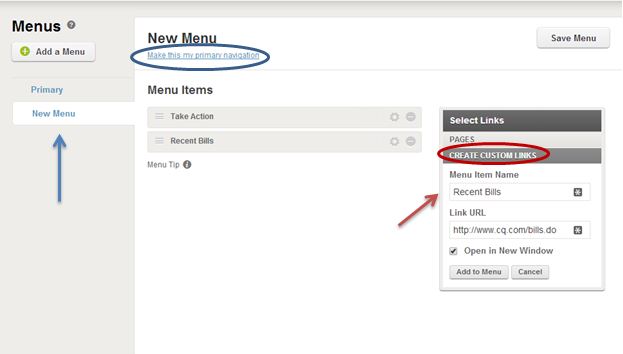
You can create additional menus, but you will only be able to use one menu at a time on your site. Click on “Add a Menu” and follow the previous steps. Select which menu you would like displayed on your site by clicking “Make this my primary navigation”. The menu that you select as the primary menu will appear on all of your pages on the front end.
If you would like to add links to non-Engage websites to your menu bar, click on “Create Custom Links” located at the bottom of the “Select Links” box. The “Menu Item Name” will be the menu name that appears on your public facing site. Enter the URL of the website and add it to the menu. Save the menu.