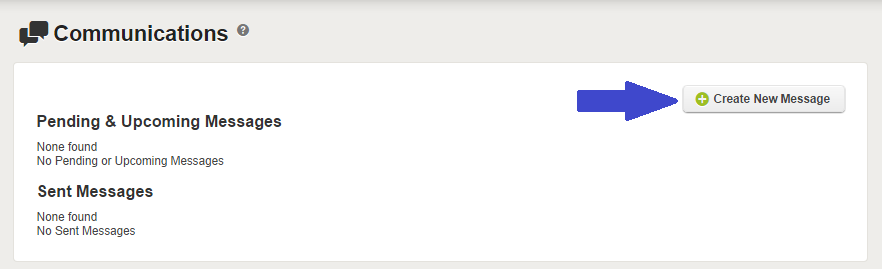
To send a simple Engage Communication to activate your advocates begin by visiting the “Communications” page under the Engage navigation item and click the “Create New Message” button highlighted by the blue arrow in the image below.
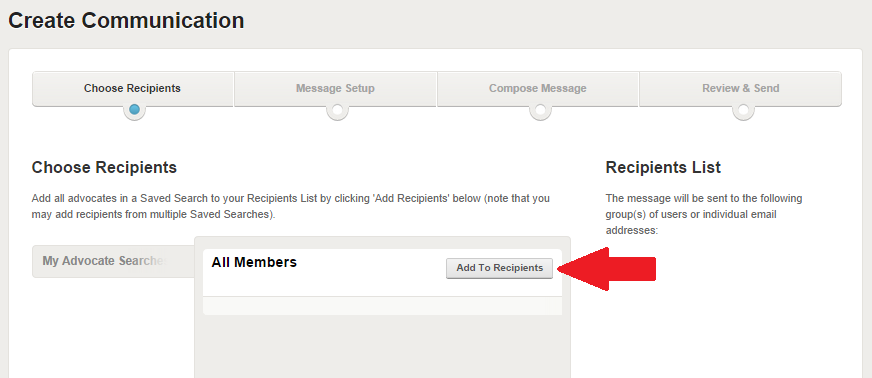
On the first page of the Communications editor you will be required to select the advocates who you would like to receive the email. Your saved advocate searches will be automatically populated on this page. To add a search to the email recipients click the “Add to Recipients” highlighted by the red arrow below. You may add as many search groups as you would like to the recipients list, even if an advocate appears on multiple lists that advocate will one receive the email communication one time.
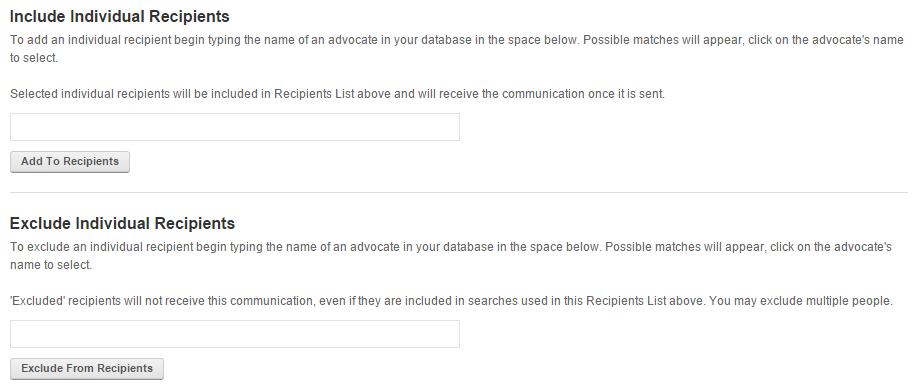
If you would like to include or exclude any individuals as recipients scroll to the bottom of the page. Begin typing the name of the advocate in the text box, select the advocate and click “Add To Recipients” or “Exclude From Recipients” to add them or exclude them respectively. After you have selected your Recipients click the “Continue” button on the lower right of the page.
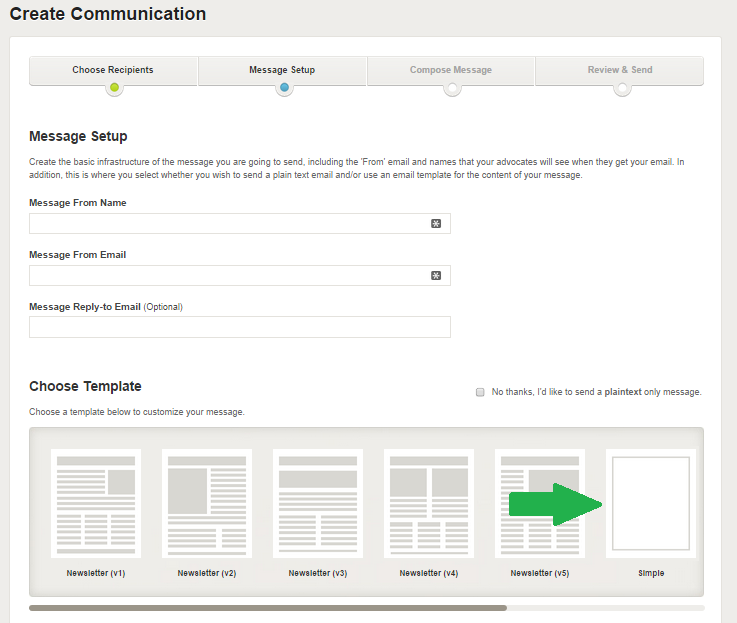
Next you will determine the basic setup of your message. If you have already determined your default text it will be automatically populated on this page where you may leave it as is or edit it. If you have not set your default text, enter your message setup info on this page. Your “Message From Name” and “Message From Email” will be what your advocates see in their email inbox. If you would like to use a different email address for replies (this address will not be visible to your advocates) enter it in “Message Reply-to Email.”
Select the “Simple” template (highlighted by the green arrow below) and click the “Continue” button on the bottom right of the page.
The next page is the “Create Communication” page where you will determine your message’s content.
Your first step will be entering the subject line of your email communication in the space highlighted by the red arrow below. This will be the subject line of the email that your advocates will see in their inboxes. You may customize the subject line by using merge fields to pull data stored in your advocate profiles to your email subject line. Simply click the “Insert Merge Field” button (highlighted by the blue arrow below) and follow the directions in the popup window.
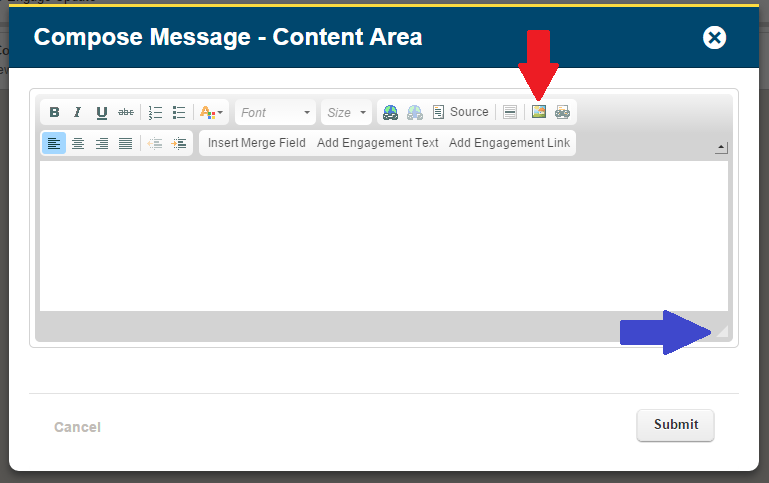
Next, click inside the yellow dotted line in the “Message Content” area (highlighted by the green arrow below) to open the email content editor.

After you’ve clicked the content area, the content area editor will open. If you would like to change the size of the content editor window, click and drag the triangle on the lower right of the editor (highlighted below by the blue arrow) to your desired size.
Your first step will be adding your message’s image banner. Click the add image button (highlighted by the red arrow below) to open the image selector. Please note that your image will appear where you have clicked in the body of the content area – this is especially important when adding images to an email that already contains text.
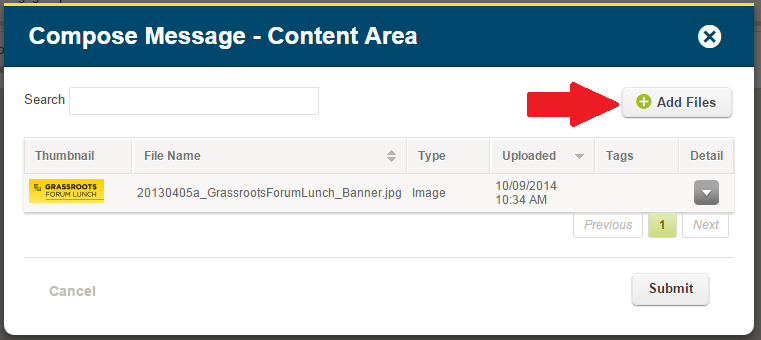
Select an image already uploaded to your file manager or used in a previous communication from you library by clicking the image. To upload a new file from your computer by clicking the “Add Files” button (highlighted by the red arrow below).
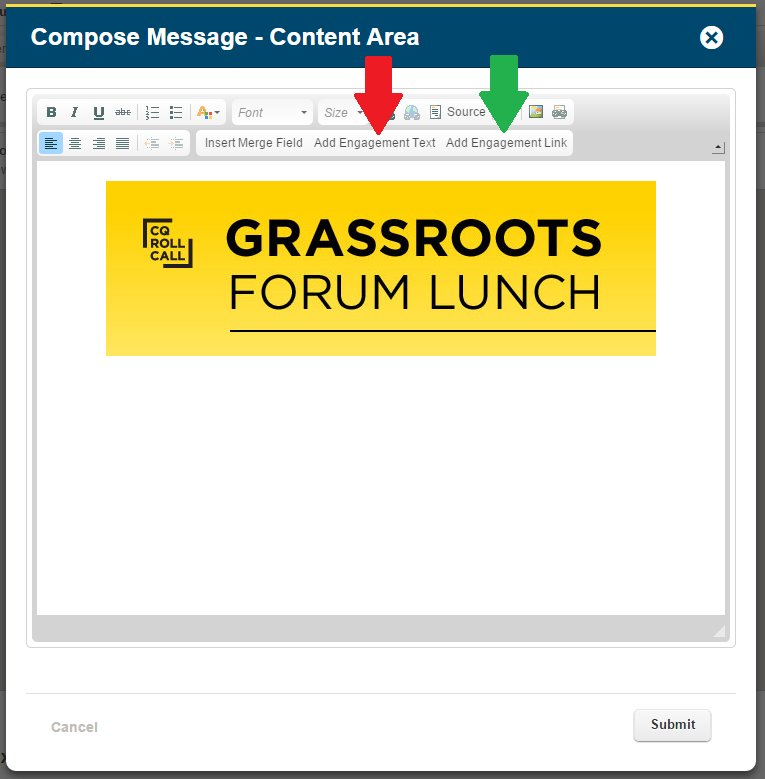
To help ensure proper display across email clients it is best to have your image size edited prior to uploading it to your library. The ideal size for the banner image is 560 pixels wide and 75-175 pixels high. In the example below, the banner is 560px by 175px.
After you’ve added your banner image to your message, click your cursor in the content area and hit the return key to bring the cursor to the line below the image and click the “Add Engagement Text” button (highlighted by the red arrow below) and select the Engagement you want to activate your membership to take action on. This will populate the “Engagement Text” you had published in your selected Engagement into the content area of your email communication. Next, click the “Add Engagement Link” button (highlighted by the green arrow below) and choose the corresponding Engagement. A link to that Engagement will populate the “Action Label” you had published in your selected Engagement into the content area of your email communication. Once you have finished editing your message content, click the “Submit” button.
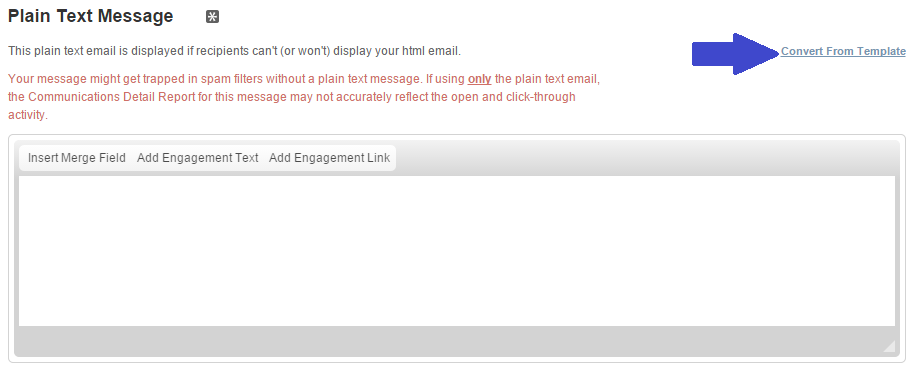
Scroll down the Compose Message page. Plain text versions of you message is required. You may enter the text in the field or use the “Convert From Template” tool (highlighted by the blue arrow in the image below) to automatically populate the field with the content from the message above.
Click the “Continue” button to proceed to the “Review & Send” page.
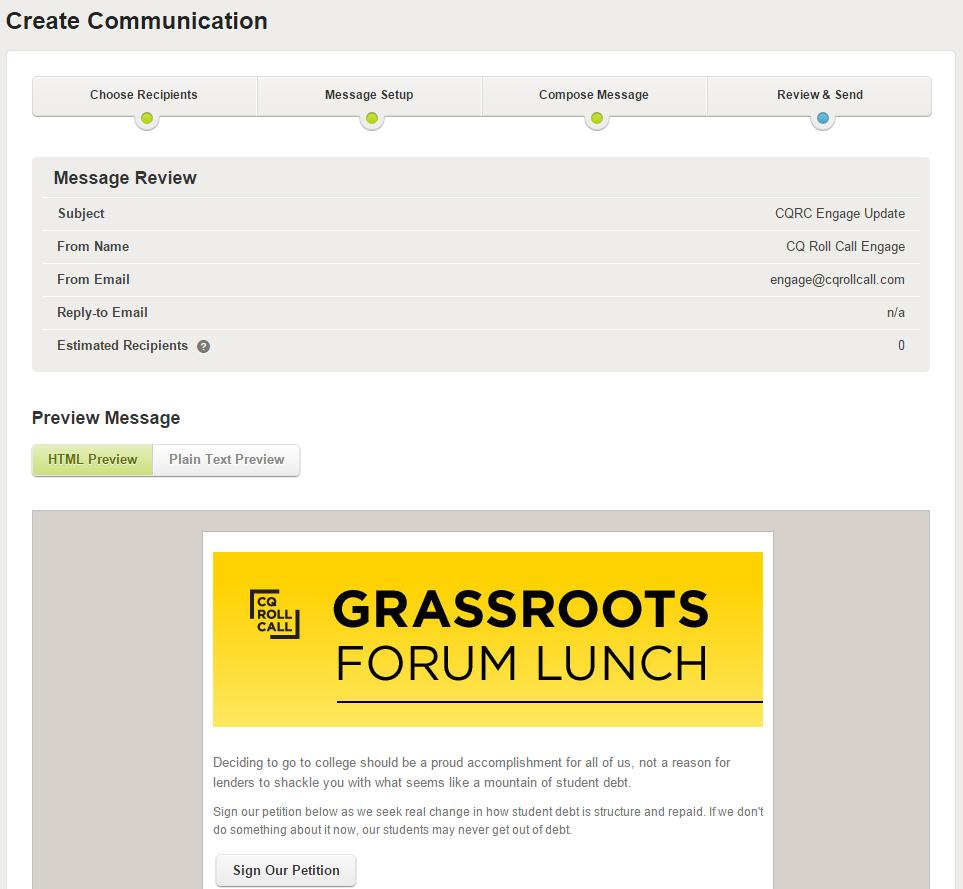
On the “Review & Send” page you’ll have the opportunity review your message settings and see a simple preview of your message. If you need to update any areas use the back button at the bottom of the page or click the desired tab along the top of the page.
Engage also offers the option of pre-populating the advocate information form on the first step of the Engagement using the data attached to their emails in Engage. Note: If the advocate forwards their personalized email to another recipient, the original recipient’s information will be populated on the form. To turn this feature on, check the box highlighted by the green arrow in the image below.

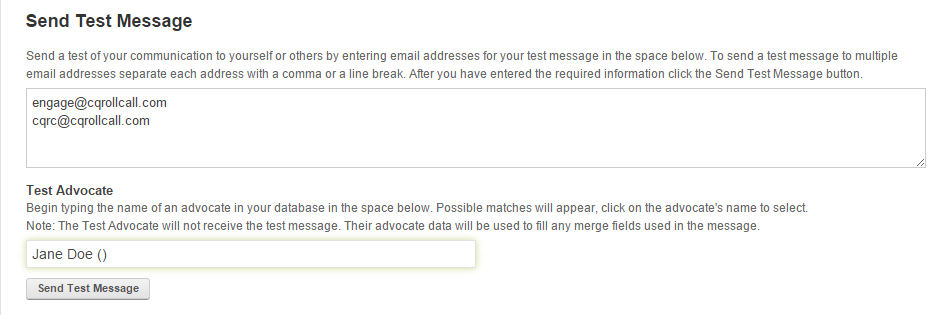
Below the Additional Content Options section you’ll have the opportunity to send a test message to yourself and/or colleagues. Enter the email addresses that you would like to send a test message to in the “Send Test Message” field. If you have used merge fields in your communication you will be asked to select a “Test Advocate” from your database. This advocate’s information will be used to fill the merge fields in the test message but they will not receive the communication. In the example below, engage@cqrollcall.com and cqrc@cqrollcall.com will receive test message and Jane Doe will not, but her information will be used to fill any merge fields.
When you are ready to send or save your communication select save as draft, send message as soon as possible, or send message at specific date and time (Note: messages set for a specific date and time must be set for at least one hour later than the current time) and click the “Finish” button.

Re-sending the Message:
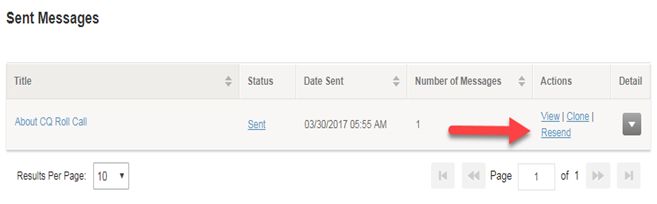
Once the message is sent, you can also resend the message to those who had not opened the original communication.
In the Sent Messages section, you will see a “Resend” option under Actions.
When you click on Resend option, a pop up will display.
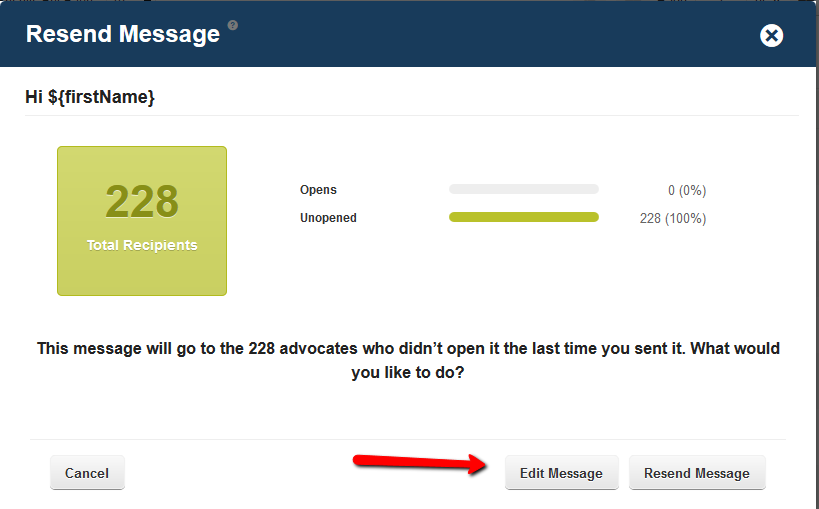
From here, you can chose to Edit the message before re-sending it, or just re-send the message as is. When queued, the message will only go out to those who did not register an open.