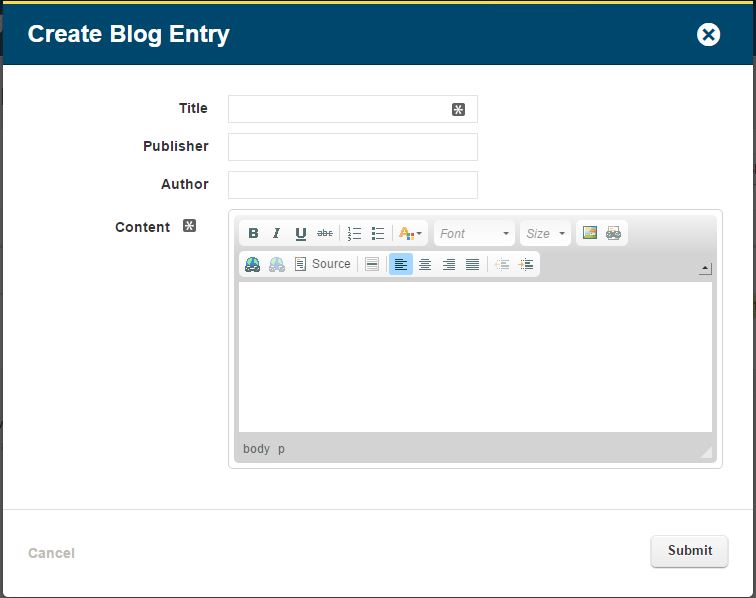
You can create your own custom articles in Engage using the Blog Entries function. Hover your mouse over the content tab and select Blog Entries. Click on Create Blog Entry to get started. Fill out the qualifying information: Title, Publisher, Author, and Content and click Submit.
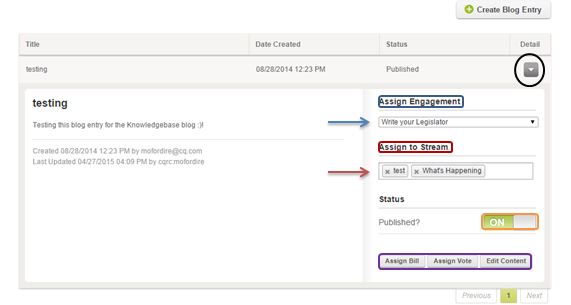
You should, now, see your blog listed on the Blog Entries landing page. Click on (![]() ) under the Detail column to edit or customize the blog further.
) under the Detail column to edit or customize the blog further.
Assign Engagement– Select an engagement to display on your blog post.
Assign to Stream– You can create a stream for your blog posts or assign the blog to an existing stream.
Status– Slide to the right to publish the blog. Slide to the left yo un-publish the blog.
Assign Bill– You can associate a bill with your blog post.
Assign Vote– You can associate a vote with your blog post.
Edit Content– Edit the content in your blog post.
To display your blog post on your site, create a stream for it and select the stream when creating an Issue Page or Standard Page.
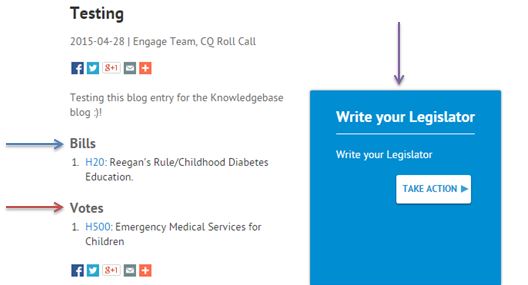
This is how your published blog will look if you assign an engagement, bill, and vote to the post.
Helpful Hints:
- When content is copied and pasted from another source, such as Microsoft Word, the styles and fonts of the Word document will be carried over to the blog post and may not match the rest of your Engage site’s styles. To avoid this either create content in the blog editor itself or copy and paste the content into a plain text application like Notepad before recopying and pasting from the plain text application into the blog post editor.
- The blog excerpts that appear in Stream Modules are determined by the first paragraph tag. If you’ve pasted content into the blog post editor you may need to add a closing paragraph tag. To designate the end of the excerpt, click the “Source” button on the blog editor and paste in </p><p> (closes a paragraph and opens a new one) where you would like the excerpt to cut off.


