Election Page Setup Wizard
The Election Page Setup Wizard helps Engage clients create an election and GOTV focused page on their public facing Engage site.
The Wizard is a step by step process that allows the administrator to add the following modules to their Election Page:
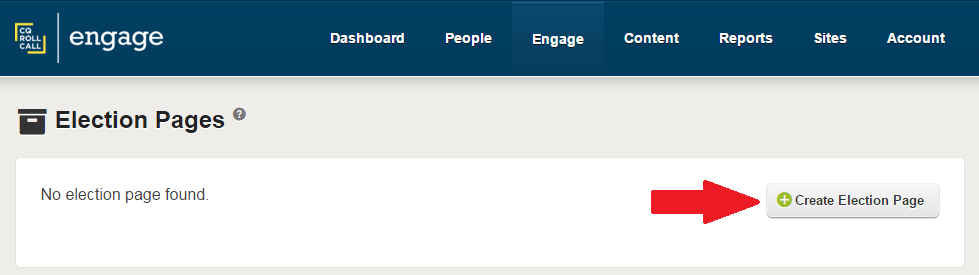
To start the Election Page Setup Wizard hover your mouse over the Sites tab and click on Election Pages. Next click the “Create Election Page” button.
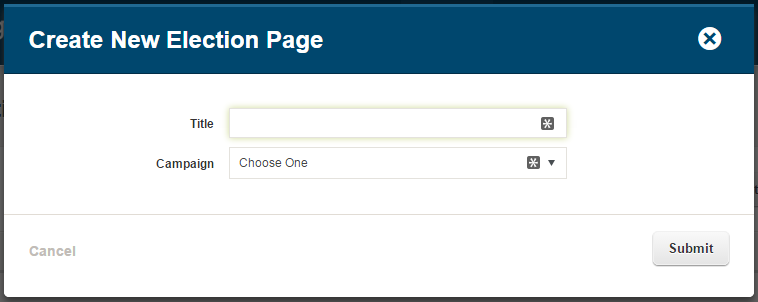
Begin by adding your page properties.
- Title: The title of your page that will appear in the browser tab of the public facing page and the label in the Engage admin. This field is required.
- Campaign: Select the Campaign the that the Register to Vote Engagement will be assigned to. This field is required.
Click the Submit button to continue.
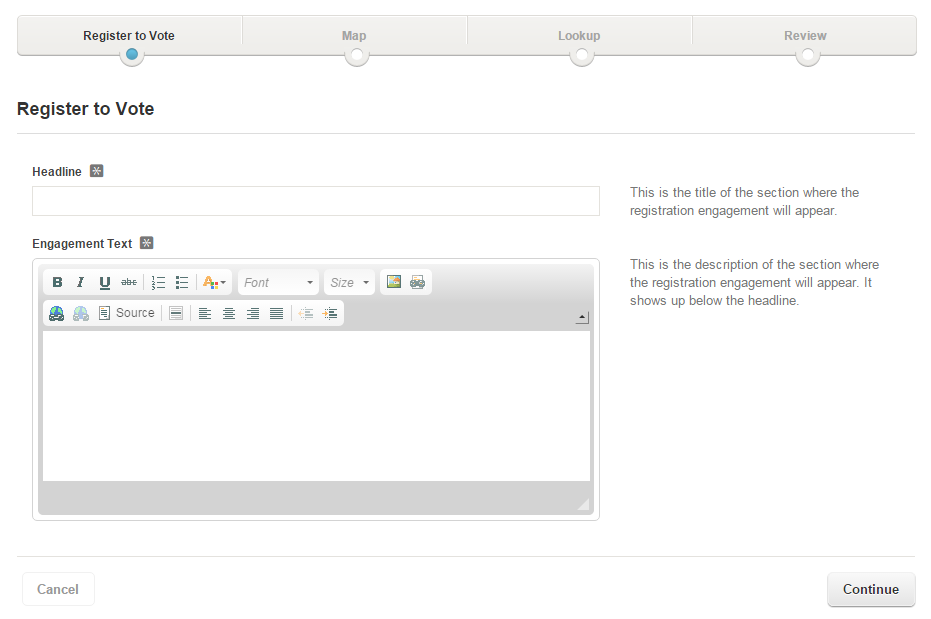
The first tab of the wizard is the Register to Vote Engagement.
- Headline: The headline will be the title of the Register to Vote Engagement page and the title that appears in the Single Engagement Module, Featured Engagement Module, and List of Engagement Module. This field is required.
- Engagement Text: This text will appear below the headline and above the instructions on the Register to Vote Engagement. The text before the first paragraph page will appear in the Single Engagement Module, Featured Engagement Module, and List of Engagements Module. This field is required. Note: To customize the text that appears in the modules listed edit the Engagement and updated the “Intro Text” field after the wizard is completed.
Click the “Continue” button.
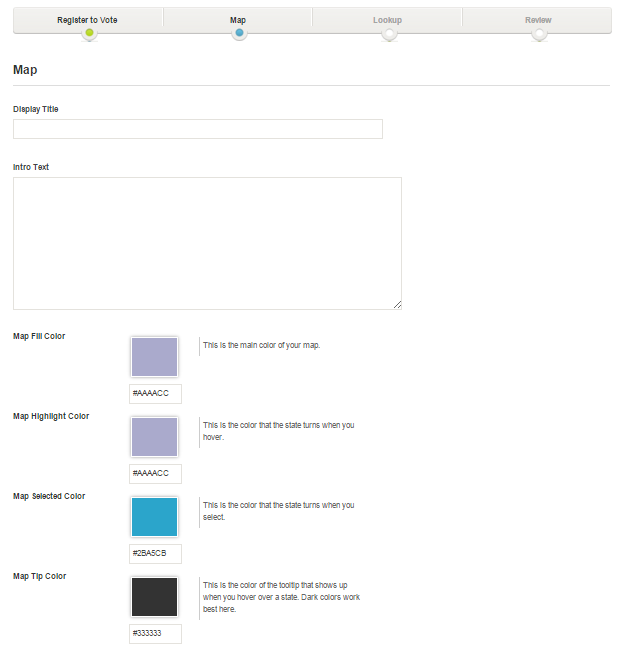
The next tab of the wizard is the Election Map:
- Title: The name that will appear on your public facing site. This field is optional.
- Intro Text: This text will appear between the title text and the map. This field is optional.
- Map Fill Color: Paste or type in the HEX color code you would like to display or choose from the color picker by clicking on the field. This is the main color of your map.
- Map Highlight Color: Paste or type in the HEX color code you would like to display or choose from the color picker by clicking on the field. This is the color that the state turns when you hover over it.
- Map Selected Color: Paste or type in the HEX color code you would like to display or choose from the color picker by clicking on the field. This is the color that the state turns when you select it.
- Map Tip Color: Paste or type in the HEX color code you would like to display or choose from the color picker by clicking on the field. This is the background color of the state name that appears when you hover over a state. Dark colors work best here.
Click the “Continue” button.
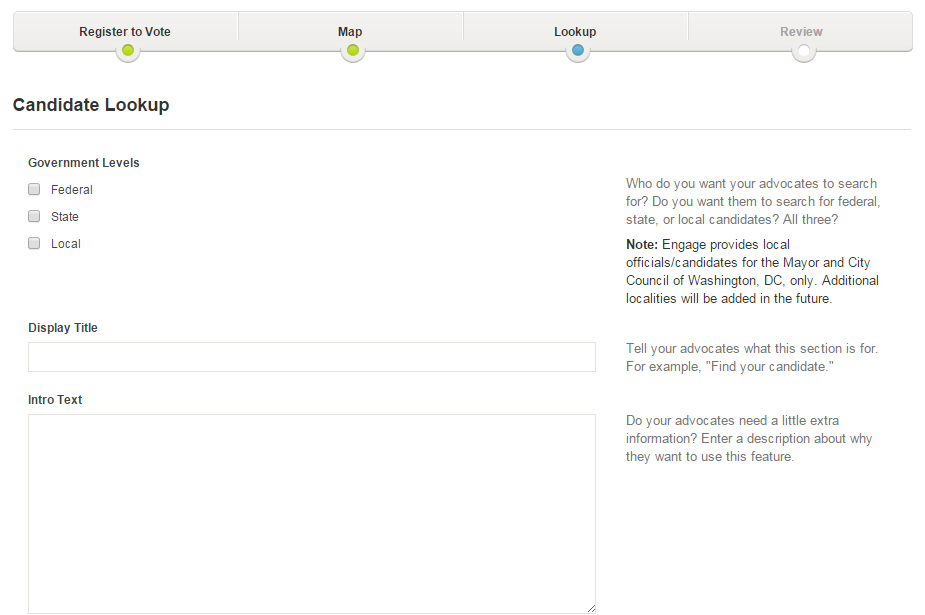
The next tab of the wizard is the Candidate Lookup Module:
- Government Levels: Select the level(s) for the lookup module.
- Federal
- State
- Local is only used for Washington, DC residents. It will display the advocate’s (with a DC address) Mayor and City Council members.
- Display Title: The name that will appear on your public facing site. This field is optional.
- Intro Text: This text will appear between the title text and the search box. This field is optional.
Click the “Continue” button.
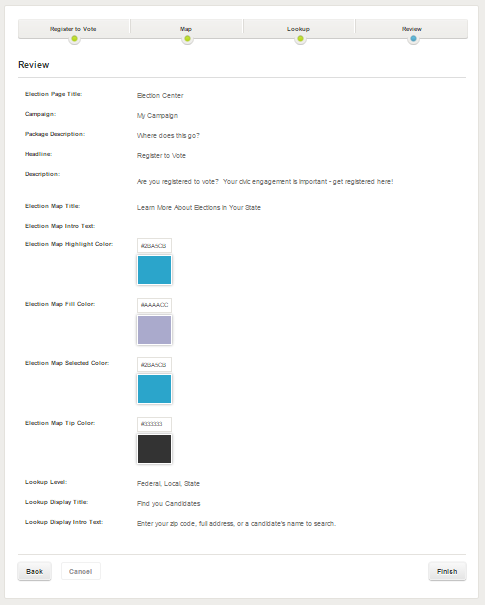
On the final tab of the wizard review the the choices that you have made. If you would like to make any changes use the “Back” button or click the tabs at the top of the page.
Click the “Finish” button.
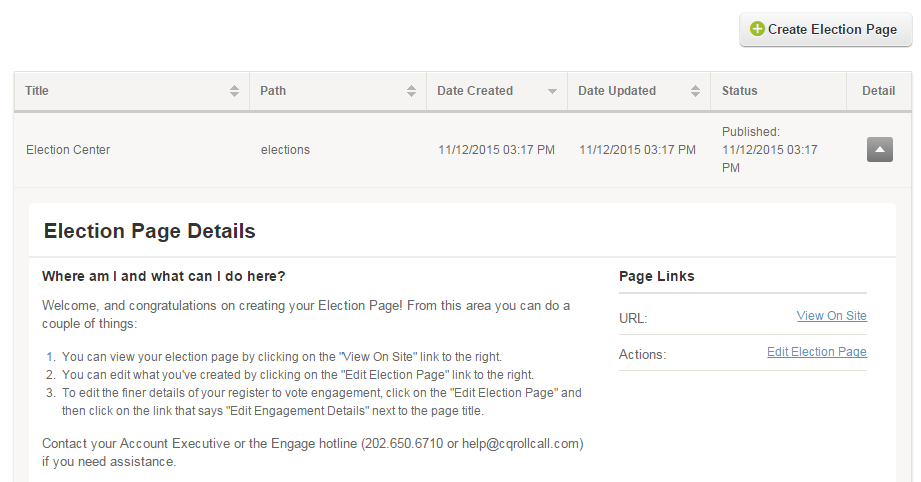
After the “Finish” button is clicked the page will be created and you will be returned to the Elections Page landing page.
On this page you can use the “View On Site” link to see the public facing page and use the “Edit Election Page” to use the wizard editor to make changes.
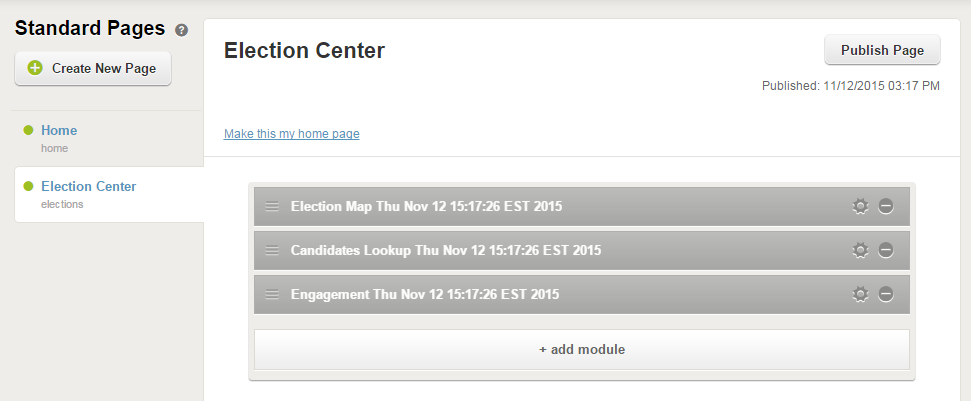
Now that your Elections page is published it will appear on your Standard Pages where you can reorder, edit, delete, and add to your modules.
Note:
- Be sure to update your Menu to direct advocates to your new elections page.
- The elements of the Elections Page can also be added to an existing or new Standard Page using the Register to Vote Engagement, Single Engagement Module, Candidate Lookup Module, and Election Map Module.
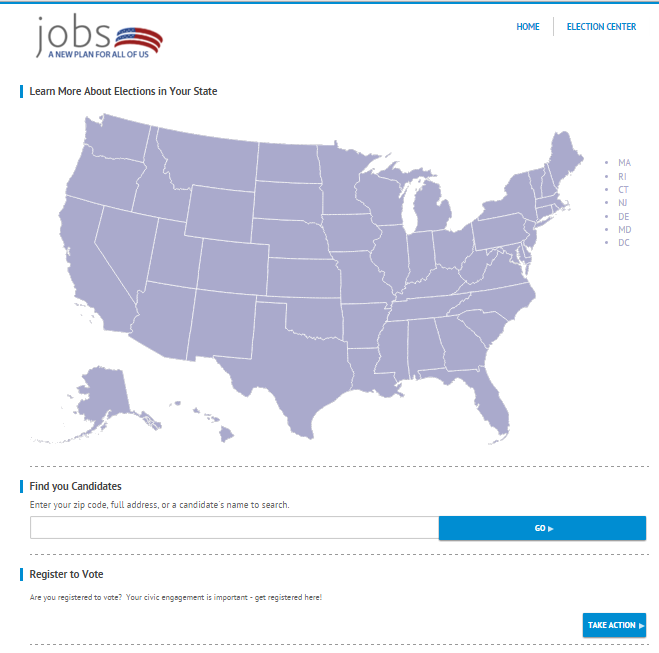
An example of a page built using the Election Page Wizard can be seen in the image below.